This blog post may contain affiliate links. If you click on these links and make a purchase, I may receive a commission at no extra cost to you. Please note that this blog is primarily for educational purposes and the content here is not intended to be a substitute for professional financial advice. Please review my disclaimer and terms here.
Anyone can create an ecommerce business as an Amazon print on demand seller. All it takes is the products, a Seller account, and some effort to get started. But not everyone knows how to optimize their sales potential on the platform.
In this post, I go over twelve of my favorite hacks to help you earn more sales with your Amazon business.
These are not all “low hanging”. They’re specifically great if you want to scale up certain products or if you’re versed in the Low Hanging fundamentals and you’re ready to make even more from Amazon.
Also, some of these hacks do require being enrolled in Amazon Brand Registry. If you’re not yet and would like to be, check out our blog post about that here.
That said, let’s get started…
1. Include high-quality product images
This one may seem like a no-brainer, but you’d be surprised by how many sellers don’t include high-quality product images. Amazon is an ecommerce platform so shoppers can’t see the items they’re interested in firsthand. They have to rely solely on the photos included in the listings.
As a result, shoppers are much more likely to buy a product if they can see it clearly from multiple vantage points (e.g. back and front). So including high-quality images can make a really big difference in your sales. Just please note that the default photo on Amazon always needs to have a clear, white background.
Fortunately, you don’t have to invest in expensive cameras or professional photographers when you do the Low Hanging System. When you’re part of LHS, you get access to tons of engaging product mockups, including lifestyle mockups showing the products in use. All of these mockups are 100% free and you can add them to your product listings to make them more appealing to shoppers.
Search my website for “mockups” and you’ll be able to find where to download them. Here’s one set to get you started.
2. Write detailed, keyword-rich product descriptions
Amazon’s algorithm takes into account the words used in your products’ titles and descriptions when determining which products to show first in the search results. Therefore, you should include relevant keywords in your descriptions to help your Amazon print-on-demand products show up higher in the search results so you can get more sales.
Just don’t go overboard with your keywords or be redundant (aka keyword stuffing), as this can actually lower your ranking.
Your product descriptions should be clear, concise, and proactively answer shoppers’ questions. Include the most important information at the top and work your way down. Shoppers don’t want to spend a lot of time reading descriptions. They want to learn the most important information quickly and then make a decision.
Additionally, buyers often make purchases based on emotional impulses, so you may want to include phrases like “not sold in stores” to pique their interest.
To learn more about writing effective bullet points in your Amazon product descriptions, click here.
3. Promote your Amazon print on demand products on social media
One of the advantages of selling Amazon print-on-demand products is you get to leverage Amazon’s pre-existing traffic so you don’t have to rely on extensive traffic-driving techniques to get visitors to your store.
But really, you can never have too much targeted traffic. So if you want to sell more products on Amazon, you can promote your products on social media.
The major social media platforms include…
- TikTok
You can create an account and profile on each of these platforms where you can post videos and images showing pictures of your products and describing their benefits. In your posts, you should also include links to your Amazon listings along with relevant hashtags, like #pitbullshotglass or #momcoffeemug, for example.
To optimize your social media efforts, you need to post content regularly. That’s how you’re going to build up a following. This, of course, takes time – time you may not have. But you can use posting tools like SocialBee and Hootsuite to schedule content in advance and have it post on a continuous loop.
Also, if you’re at a loss for what to say in your posts, check out my 31 Days of social media content ideas.
4. Add Amazon’s A+ Content
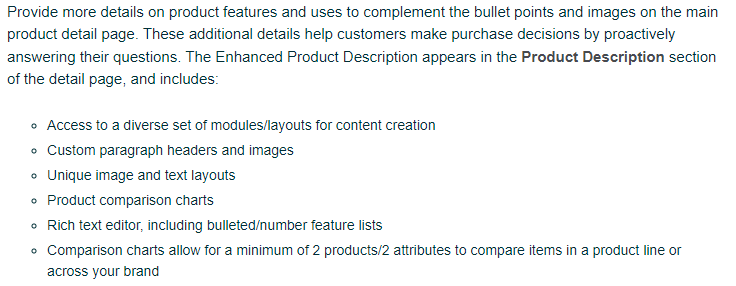
Amazon’s A+ Content is available to professional sellers and brand owners for free. A+ Content lets sellers use enhanced images and text placement along with more engaging product descriptions that proactively answer customer questions.
Adding A+ Content to your Amazon print-on-demand products’ detail pages has several benefits, including the potential for higher conversion rates and discoverability. Plus, addressing potential customer questions upfront may lead to fewer negative reviews and a lower likelihood of products being returned.
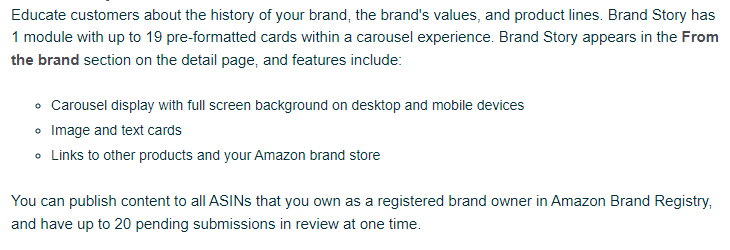
A+ Content can include two main content types:
Enhanced Product Description
A+ Brand Story Content
To get started with A+ Content…
- Inside Seller Central, go to Advertising then A+ Content Manager
- Click the Start creating A+ Content button
-
Select the type of A+ content you want to create
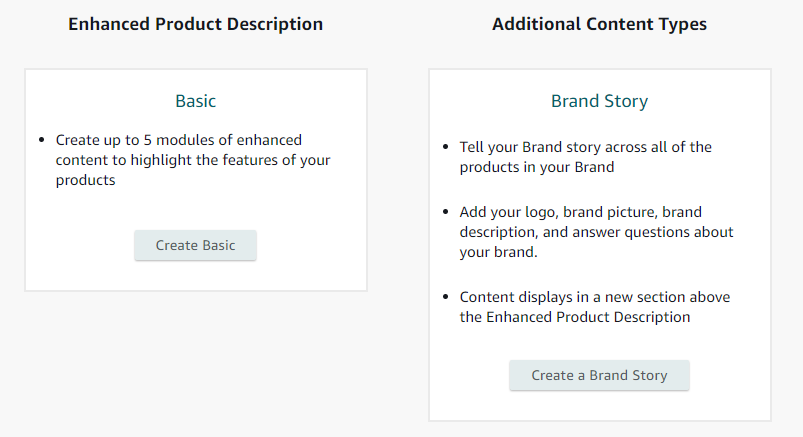
If you select Create Basic, you’ll see this:

And if you select Create a Brand Story, you’ll see this:
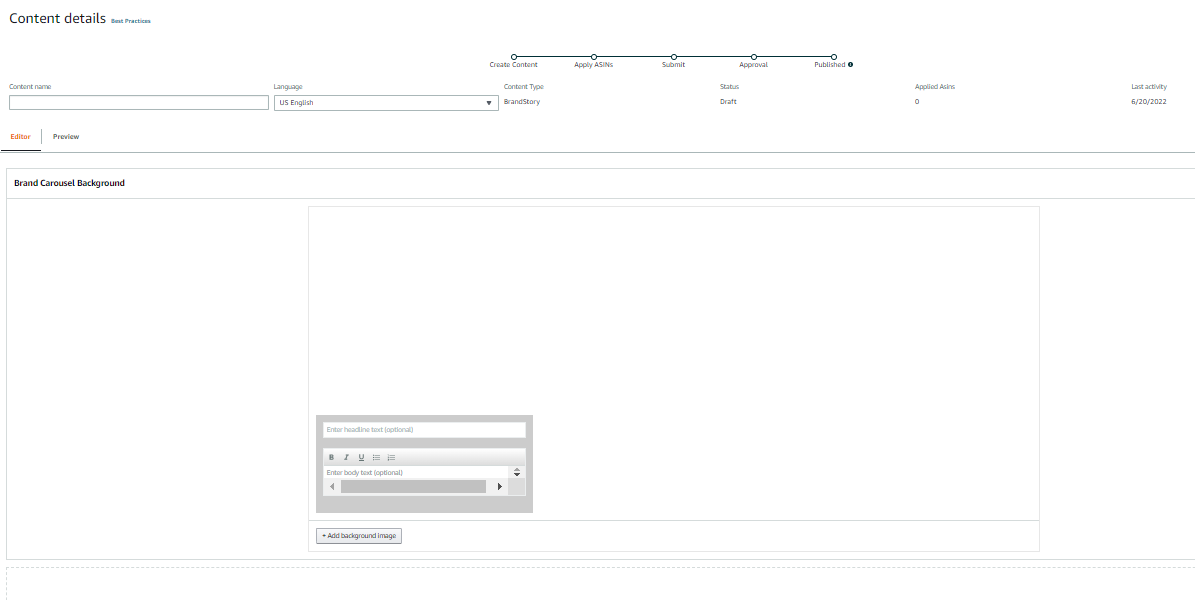
After creating your content details, you apply your ASINs.

Then, when you’re done, click Review & submit.
You can learn more about creating A+ Content here.
5. Offer coupons
Offering discounts and coupons is a great way to boost sales on Amazon. You can create coupons in your Seller Central account and then promote them on your product listings and other marketing materials.
How to create a coupon code for a percentage discount (e.g. 20% off):
- Login to your Seller Central account
- Go to the ADVERTISING tab
- Choose Promotions from the drop-down menu
- Click Manage Product Selection
- Click Product Selection Type
- Select ASIN list from the drop-down
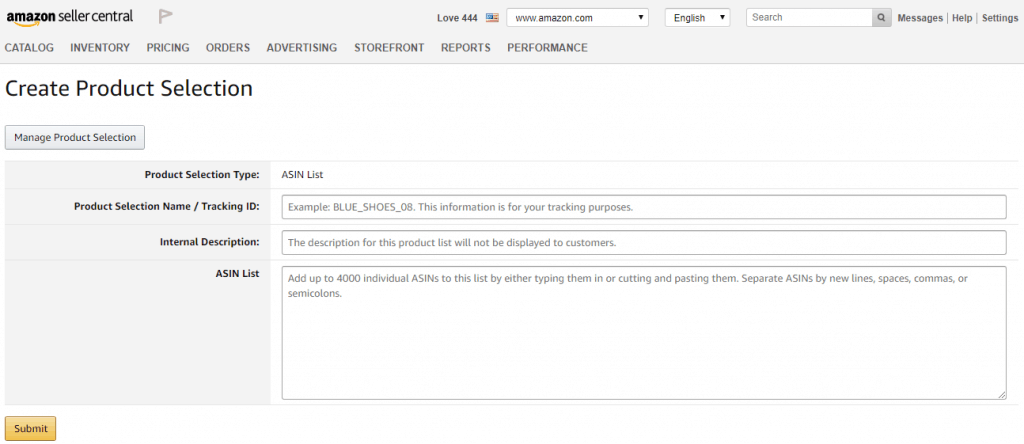
- Open a new browser tab and go to the Amazon listing for the product you want to make a coupon code for
- Scroll down to the Product information section and look where it says ASIN
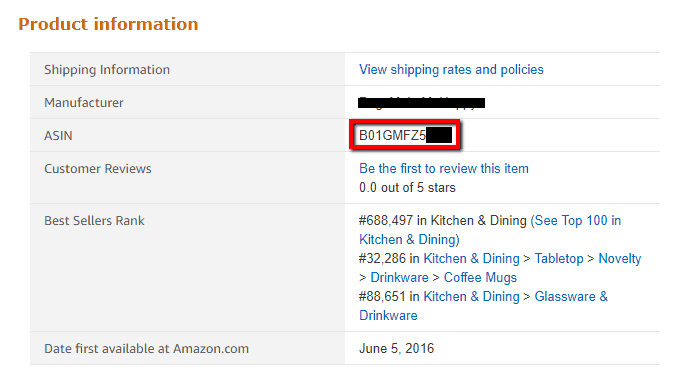
- Copy the ASIN number and paste it where it says ASIN List in Seller Central
- Then, fill in the rest of the information based on your Amazon listing (Product selection name/Tracking ID, Internal Description)
- Click Submit
- Click Create a Promotion
- Click Create under the Percentage Off option (you can create other kinds of promotions as well, but this is the one I usually do)

Fill in step 1: Conditions
- Buyer purchases: I leave this as 1
- Purchased Items: From the drop-down, select the name of the product you just created a new product selection for
- Buyer gets – Percent off: Discount the discount you want to give (I typically do 10-20%)
- Applies to: Purchased Items

Fill in step 2: Scheduling
- Select your start and end times and dates for the promotion
(NOTE: Coupon codes always start a few hours out, so make sure you don’t have your customers use the coupon code too soon, i.e. before it becomes active, or it won’t work.)
- Internal Description: Something like [product name] + [product type] suffices – e.g. I love pit bulls – pit bull coffee mug.
- Tracking ID: I leave this as is, but you can use it if you want to do paid advertising and track analytics

Fill in step 3: Additional Options
- Claim code: Single-use
- One redemption per customer: Check
- Claim code: Leave as is
- Claim Code Combinability: Exclusive – This is really useful in terms of preventing people from adding multiple coupons to your products in order to get them for free
- Custom messaging: You can fill this is in if you want, but it’s optional

- After you finish with these three steps, click Review
- If everything looks good, click Submit
To get a claim code:
- Click View or modify your promotion
- Click Manage claim codes
- Group name: Enter the name of the product you created a coupon code for
- Quantity: Enter the number of codes you want
- Click Create
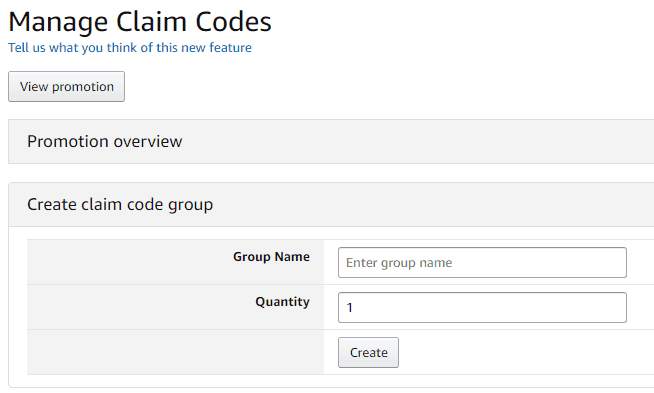
- Once the page refreshes, click where it says Download at the bottom right-hand side.

- Open the zip file
- Open the text document
- Copy the code
6. Provide free shipping
Amazon shoppers love free shipping. In fact, many have come to expect it, especially if they’re Prime members. Offering free shipping doesn’t mean you have to cut into your profits, though.
You can raise the prices of your products to absorb your shipping expenses and then make your shipping free. Higher product prices don’t deter shoppers the way shipping expenses do, so you’ll likely still make sales.
To make your shipping free on Amazon, log into Seller Central, go to Shipping settings and change your rates to $0.00.
7. Create an Amazon storefront
An Amazon storefront is a great way to showcase all of the products you sell on Amazon. It’s basically a mini-website within Amazon that gives potential buyers an easy and super engaging way to see everything you have to offer. Amazon storefronts are free to create but they’re only available to sellers enrolled in Amazon Brand Registry.
To create an Amazon storefront, click here and then get started.
From there, follow the prompts and create pages for your Amazon products using the available features and templates. You’re able to add text, images, and videos to showcase your products. When you’re happy with the way your store looks, submit it for review. The review process typically takes twenty-four hours.
You can learn more about the creation and launching processes for your storefront here.
8. Sell through FBA and get the Prime badge
If you want to take advantage of Amazon’s Prime shipping benefits but don’t want to deal with fulfillment, you can use the FBA program. With FBA, Amazon handles all of the shipping and customer service for your products. And selling through FBA is the easiest way to make your products Prime eligible (FBA items automatically get the Prime badge).
More than 112 million people use Amazon Prime’s subscription service. And generally speaking, products with the Prime badge sell more than those without it. Shoppers trust the Prime badge. They know it means fast, reliable shipping, which they have come to expect. So if you want to increase your sales on Amazon, selling through FBA and getting the Prime badge is a great way to do it.
To learn more about how you can sell Amazon print-on-demand products through FBA, I wrote an in-depth post a while back which you can check out here. The post also includes a video from one of LHS’s fantastic coaches.
9. Participate in Amazon’s Vine program
Vine is a program that invites Amazon’s most trusted reviewers (aka Vine Voices) to post feedback about products participating sellers send to them as a means of helping other shoppers make informed buying decisions.
When you participate in Vine as a seller, you submit free products for the Vine Voices to review. Vine Voices don’t just post positive reviews, though. Their feedback is honest so you would need to do what you can to make sure the Vine Voices have a good experience with your products.
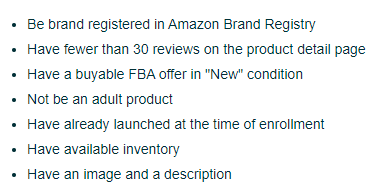
To participate with Vine as a seller, you need to be a professional seller and brand owner with a registered brand in Amazon Brand Registry. You also need to have eligible FBA offers.
Additionally, Vine charges sellers a $200 enrollment fee once per parent ASIN. But you won’t be charged until the first review is posted. And you won’t be charged at all if your product isn’t reviewed at all within 90 days.
The products you enroll in Vine to be reviewed must meet the following criteria:
10. Use Amazon’s Sponsored Products program
Amazon’s Sponsored Products program is a great way to get your products in front of potential buyers. With Sponsored Products, you create cost-per-click (CPC) ads for your products and have them show up on product pages and related shopping results on desktop and mobile versions of Amazon.
You don’t need any experience with ads to be part of this program, which offers automatic targeting. You’ll be able to use sales and performance metrics to measure your ads’ success, and you can attend the Sponsored Ads Bootcamp to learn strategies that help you run effective campaigns.
To get started with Amazon’s Sponsored Products program, click this link.
You’ll set your campaign’s duration and specify which keywords or products to target (alternatively, you can let Amazon match your ads to relevant search terms through automatic targeting). Next, you select the products you want to advertise and make your bid. Then, you’re ready to launch your campaign.
I hope you find this list of hacks for selling Amazon print on demand products useful. If you have any other insights you’d like to add, please leave a comment below. And if you’d like to REALLY supercharge not only your Amazon sales but also all of your other ecommerce sales, check out my Low Hanging Mastermind.
